SANDY Claus is Coming to Town!
Yes...SANDY Claus! All of this week, the Stampendous and Dreamweaver teams have been playing with a mix of their products, along with some wonderful, SAND-ABLE papers from Core'dinations. Join us as we sand our way to the "core" of all things Christmas and the Holiday season. Of course, there will be prizes, and we give away the best...this time with a mix of fun Core'dinations products as well. To be one of three prize package winners, follow the posted link lists from each day, leave a comment, and winners will be selected from these comments at the beginning of next week. Here is what you might win:
Christmas is only a few weeks away------where has this year gone, not only is Halloween with us but the rush to get all those Christmas things is here too.
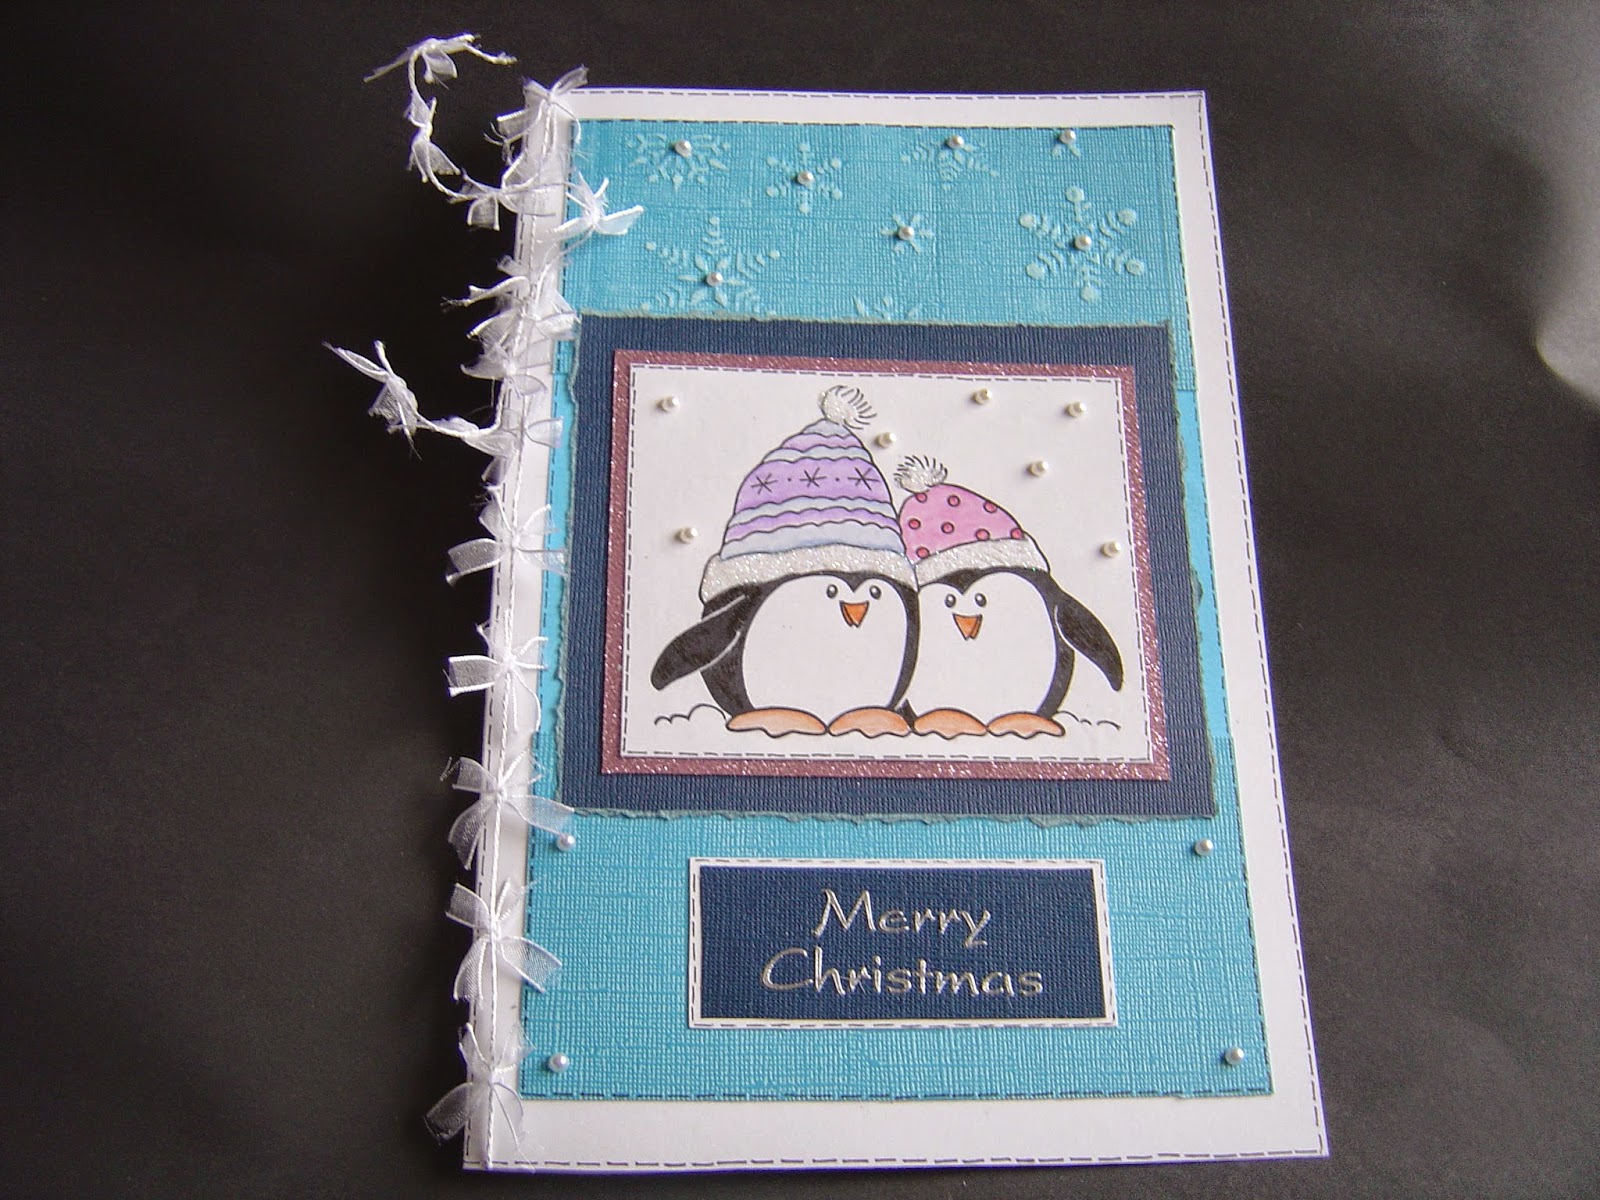
The collaboration between Dreamweaver, Stampendous and Co-ordinations has definitely given me the chance to combine different techniques. So the project today has stamping and colouring with Aquarel pencils, dry embossing and sanding back and a basic paste technique.
The card is larger than I would normally do but for someone special it seems perfect.
Here is what I used:-
Stampendous Cling stamp CRS5055 Penguin Snow
Dreamweaver Stencils LS92 Merry Christmas, LJ819 Snow background
Sakura Aquarel Pencils
Stazon ink pad (Black)
Co-ordinations Card stock Turquoise, Dark Blue, White and pink glitter card stock
Stampendous Crystal Glitter
Quickie glue pen
Micron black pen
Low tack tape
Palette knife
Silver Embossing Paste
Self adhesive pearl gems
and this is how how made the card:-

Step 1 Stamp the image using Stazon Black ink pad on to white card, coloured with the Aquarel pencils, use Quickie glue pen to colour the brims of the hats and cover with Crystal glitter. Trim the panel. (I ripped the edges to reveal the inner core of the backing card)
Step 2 The top section of the turquoise co-ordinations card was embossed using Dreamweaver Snowflake background stencil and the Big Shot machine The surface was then sanded back to reveal the inner core of the card. A panel of the same card stock was attached to the bottom of the card. This was left as the original card.
Step 3 The Merry Christmas stencil was attached to a piece of the dark blue card stock using low tack tape and silver embossing paste applied. The stencil was removed and put into water for cleaning and the paste piece was placed to the side to dry.

Step 4 The final stage was putting the card together, wrapping ribbon round the spine of the card and putting the self adhesive pearls in the centre of the snowflakes, randomly on the stamped panel and in the 4 corners of the bottom segment.
Here is what everyone else has been doing :
Dreamweaver:
*On Stampendous team as well
Core'dinations:
(will not be posting on their company blog, but individual posts only)
If you are in the UK or Europe and would like to purchase any of the products for the above project they are all available from The Stampman or your local Woodware Stockist
Hope you enjoy my card. Thanks for stopping by
Gill
Gill
What a cute card. Penguins, my favorite!
ReplyDeleteYour card is adorable! Those snowflakes really are beautiful!
ReplyDeleteLove the penguins, so cute. I have to get some coordinations papers, they are so nice looking !~kim
ReplyDeleteLove how you did the ribbon down the side! So pretty! Great card!
ReplyDeleteThe ribbon comes like this
DeleteThis feels special. Love the snowy feel of the ribbon binding and all the other sparkle.
ReplyDeleteSo cute! I love the chubby little penguins.
ReplyDeleteSuch a cute card.x
ReplyDeleteDarling card. Love the bling in the middle of the snowflakes.
ReplyDeletethanks for sharing a great card.
All the layers are just wonderful with the adorable image. Love the faux stitching!
ReplyDelete<3 J
jwoolbright at gmail dot com
HerPeacefulGarden.blogspot.com
Such a sweet card! Love those penguins!
ReplyDeleteSuch an adorable card! LOve the penguins and the ribbon along the edge is a sweet addition! TFS!
ReplyDeleteOh, those penguins are adorable :)
ReplyDeleteTerrific card! Love the cute penguins! Really adorable card!! Thx for sharing.
ReplyDeleteSo sweet - my friend would love this, she's a penguin fan!!!
ReplyDeleteLove the penguins. Great card.
ReplyDeleteI really like what you did for a background! The snowflakes with pearl how pretty.
ReplyDeleteLove the cute penguins!
ReplyDeleteSweet card! love the colors and the cute penguins.
ReplyDeleteSweet card! Love the layering, colors and darling penguins!
ReplyDeleteLove the card. Cute penguins.
ReplyDeletePenguins are a fun like different image for Christmas. You usually see Santa, reindeer and sometimes elves but penguins are harder to come by. Fabulous card. I hope my rambling let you know I like your card.
ReplyDeletevery elegant and pretty!! love!
ReplyDeleteLove the layers in the card, and such a cute stamp!! Great job. :) Thank you for sharing.
ReplyDeleteKatie B.